Gypsum Ceiling Designs Compatible with Smart Home Lighting Systems
Gypsum ceiling designs compatible with smart home lighting systems allow homeowners to combine modern interior finishes with convenient lighting control. Instead of relying on ordinary switches alone, you can control compatible ceiling lights through a mobile app, voice assistant, scheduled routines or smart switches. With proper planning, you can also adjust brightness, change colour temperature and create different lighting scenes for relaxation, entertainment or everyday activities.
At Renovation.co.ke, we help property owners plan ceiling upgrades as part of residential and commercial renovation projects. From minimalist gypsum ceilings with recessed smart downlights to floating trays with concealed LED strips, the right design can make your interior more functional while keeping wiring and lighting components neatly integrated.
However, smart lighting compatibility must be considered before the ceiling is installed. The gypsum design, LED strips, drivers, controllers, switches and smart home platform need to work together. Otherwise, you may face flickering lights, limited dimming, unreliable controls or costly changes after the renovation.
This guide explains the best gypsum ceiling designs for smart home lighting, how to select compatible technology, what to plan before installation, the factors that influence costs and how to prepare your home for future upgrades.
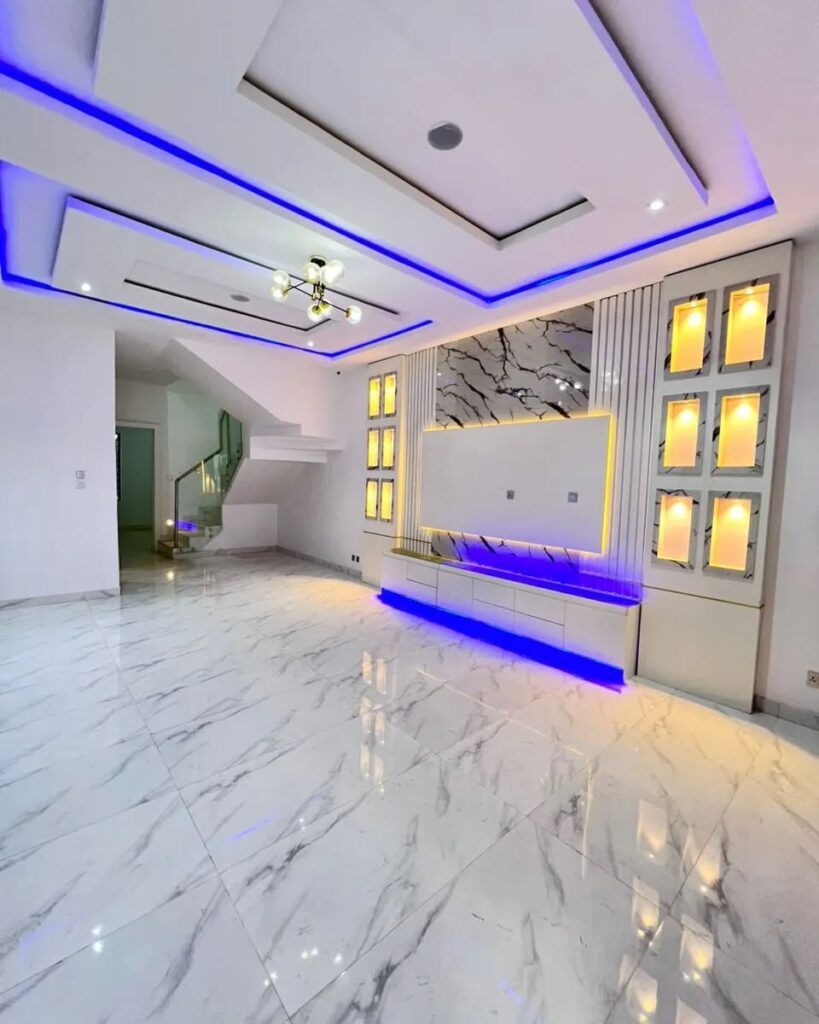
Plan Your Smart Lighting and Gypsum Ceiling Renovation
Thinking about upgrading your ceiling with app-controlled lighting, voice commands or automated lighting scenes? Start by coordinating the ceiling design with the electrical and smart home requirements before installation.
Renovation by SUIMAS Interiors helps homeowners plan ceiling improvements alongside lighting, painting and other interior upgrades.
- Request a renovation consultation
- Explore gypsum ceiling installation services
- Discover interior design services
- Learn about 3D design and layout planning
Share your room dimensions, preferred ceiling style, intended smart home platform and lighting requirements to help establish the project scope.
What We Offer
Renovation.co.ke provides renovation information and project pathways for homeowners, landlords and businesses planning property improvements.
- Smart-ready gypsum ceiling designs: Flat, tray, layered and minimalist ceilings planned around compatible lighting systems.
- Integrated LED lighting: Concealed LED strips, recessed downlights and linear lighting coordinated with the ceiling layout.
- Lighting control planning: Consider compatible smart switches, dimmers, controllers and separate lighting zones.
- Ceiling installation and finishing: Coordinate framing, board installation, joint finishing and painting.
- Smart lighting preparation: Plan wiring routes, driver locations and access for future maintenance.
- Interior design coordination: Connect ceiling lighting with wall colours, furniture, flooring and feature walls.
- Residential and commercial renovation: Coordinate ceiling improvements with other building and interior works.
- 3D design and layout planning: Visualise the proposed ceiling and lighting arrangement before installation.
Explore Renovation.co.ke for renovation services and SUIMAS ceiling installation for more information about gypsum ceiling solutions.
What Makes a Gypsum Ceiling Smart Home Compatible?
A smart-ready gypsum ceiling is designed to accommodate lighting fixtures and control equipment that work with the homeowner’s chosen automation system.
The gypsum boards themselves are not what makes the ceiling smart. Compatibility comes from the lighting products, electrical installation, controllers, network or hub, and the way these components are integrated.
A smart lighting system may let you switch lights on and off remotely, adjust brightness, create preset scenes, schedule lighting times or control compatible fittings through voice commands. The available functions depend on the actual products installed.
For example, a living room could have three separately controlled lighting groups: recessed downlights for general illumination, concealed LED strips for ambient lighting and a pendant for the main seating area.
You might then create a movie scene that dims the downlights and LED strips, or an entertaining scene that provides brighter general illumination.
The key is to plan these groups before the electrician completes the wiring and the installer closes the ceiling.

Best Gypsum Ceiling Designs Compatible with Smart Home Lighting
Different ceiling shapes offer different opportunities for integrating smart lighting. Choose a design that suits your room dimensions, available headroom and intended use.
1. Minimalist Gypsum Ceiling with Smart Recessed Downlights
Best for modern apartments, bedrooms, compact living rooms and offices.
A minimalist ceiling uses a smooth surface and limited decorative detail. Compatible smart downlights can provide app-controlled switching, brightness adjustment or colour-temperature changes, depending on the fittings selected.
This option is useful when you want smart lighting without introducing several ceiling levels.
How to integrate the controls: Select downlights that support your chosen control system. Plan their positions, electrical connections and switching zones before installing the boards.
Design tip: Avoid installing too many downlights simply because they can be controlled independently. Base the layout on the room’s dimensions, lighting needs and furniture arrangement.
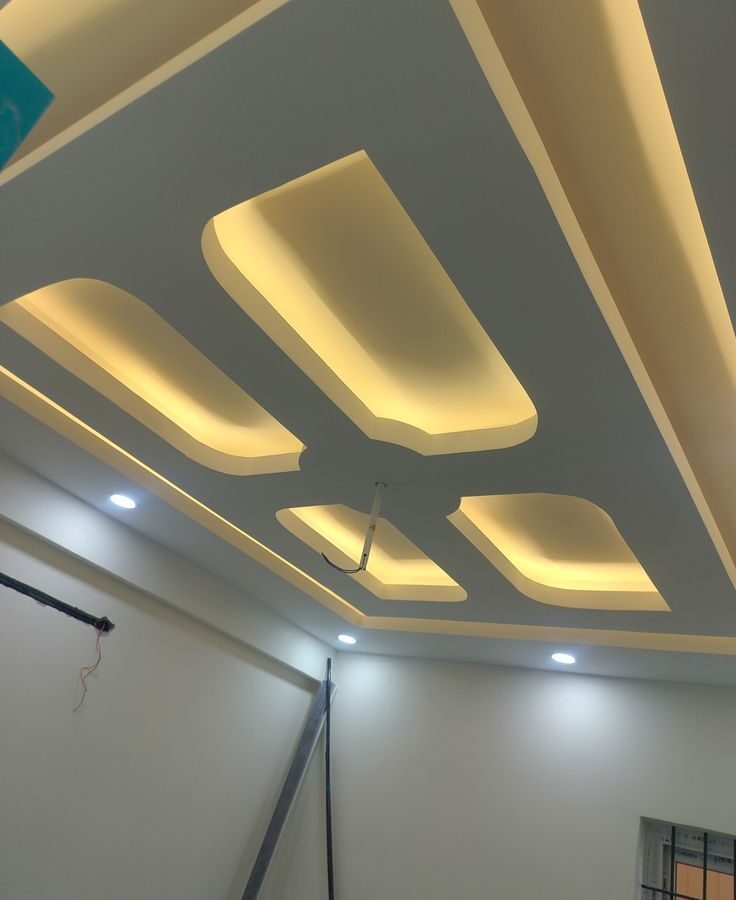
2. Floating Gypsum Ceiling with Concealed Smart LED Strips
Best for modern living rooms, master bedrooms and contemporary lounges.
A floating ceiling uses a recessed gap or perimeter feature to make part of the ceiling appear visually separate from the surrounding surface.
Concealed LED strips can highlight the gap and produce indirect light that reflects onto the ceiling. When compatible with a smart controller, the lighting can be dimmed or assigned to scenes.
How to integrate the controls: Confirm the LED strip type, controller, driver and desired dimming method before selecting the ceiling channel.
Design tip: Maintain a consistent recess and use a suitable lighting profile where required. Plan access to the driver and controller so they can be inspected or replaced without unnecessary ceiling damage.
3. Tray Gypsum Ceiling with Smart Lighting Zones
Best for living rooms, dining areas and spacious bedrooms.
A tray ceiling has a recessed central section surrounded by a raised or dropped border. It provides an ideal opportunity to separate central lighting from perimeter illumination.
For example, the centre might contain downlights or a pendant, while the surrounding border contains concealed LED strips.
How to integrate the controls: Establish separate lighting zones where the selected system allows them. You can then control general illumination and indirect lighting independently.
Design tip: Keep the tray proportions appropriate for the room. A deep tray can reduce available headroom, so confirm the finished ceiling height before approving the design.
4. Layered Gypsum Ceiling with Scene-Based Lighting
Best for spacious houses, family lounges and entertainment rooms.
Layered ceilings use two or more levels to create depth and architectural detail. Different layers can accommodate suitable lighting features, such as recessed downlights, concealed LED strips and selected linear fittings.
With compatible controls, the lighting groups can be combined into scenes for different activities.
How to integrate the controls: Decide which fittings should work together and which need independent control. A smart home installer can confirm the appropriate controller arrangement.
Design tip: Do not add extra ceiling levels only to create more lighting channels. Each layer increases the complexity of framing and finishing, so every feature should serve a clear design purpose.
5. Geometric Gypsum Ceiling with Smart Linear Lighting
Best for modern homes, offices and contemporary commercial interiors.
Geometric ceilings use rectangles, squares and straight lines to define the surface. Linear LED fittings or suitable recessed LED profiles can follow selected shapes.
Compatible controls can adjust the lighting or switch separate sections independently, depending on the components chosen.
How to integrate the controls: Confirm the size of the fittings, their mounting requirements and their electrical specifications before the ceiling layout is finalised.
Design tip: Use one dominant geometric pattern. Too many illuminated shapes can make the ceiling visually crowded and increase installation costs.
6. Simple Gypsum Ceiling with Smart LED Panels
Best for offices, study rooms, corridors and practical residential spaces.
LED panels can provide broad, even illumination. Depending on the model, they may support smart switching, dimming or colour-temperature adjustment.
This option allows the ceiling to remain relatively simple while introducing more flexible control.
How to integrate the controls: Check whether the selected panel has built-in smart functionality or needs a compatible external controller.
Design tip: Choose fittings that provide appropriate illumination for the room and avoid glare on computer screens or television displays.
7. Minimalist Ceiling with a Smart Central Pendant
Best for dining rooms, smaller living rooms and bedrooms.
A minimalist gypsum ceiling can use one central pendant as the main decorative feature. Depending on the chosen product, the fitting may support smart switching, dimming or colour adjustment.
You can pair it with separate smart downlights or indirect lighting if the room needs additional illumination.
How to integrate the controls: Verify whether the pendant has a smart driver or built-in control system, and check whether it works with the intended home automation platform.
Design tip: Select a fitting that suits the room proportions. Heavy pendants require suitable support rather than attachment to gypsum board alone.
8. Cove-Lit Gypsum Ceiling with Smart Dimming
Best for bedrooms, lounges and rooms where lighting mood matters.
Cove lighting conceals a light source within a ceiling recess so that light reflects onto nearby surfaces. A compatible dimmable LED system allows users to adjust brightness to suit the activity.
This arrangement can complement a plain ceiling, shallow tray or layered design.
How to integrate the controls: The strip, driver and smart dimmer or controller must support the same dimming method. Not all LED strips are dimmable, and not every dimmer works with every LED driver.
Design tip: Choose the lighting colour and brightness according to the room’s purpose. Make sure the strip is installed in a suitable channel and that its driver remains accessible.
9. Gypsum Ceiling with Smart Tunable-White Lighting
Best for living rooms, bedrooms and multi-purpose spaces.
Tunable-white lighting can adjust between different shades of white, subject to the product’s supported range. This allows the lighting atmosphere to change without repainting or altering the ceiling.
For example, a homeowner may choose a warmer setting in the evening and a more neutral setting when performing tasks that require clearer illumination.
How to integrate the controls: Use a compatible tunable-white strip or fitting and the appropriate controller. A standard single-colour LED strip cannot automatically change colour temperature.
Design tip: Keep the changes comfortable and consistent across the room. Different fittings should be specified to work together if you intend to control them as one scene.
10. Smart RGB or RGBW LED Ceiling Features
Best for entertainment rooms, gaming spaces and selected contemporary interiors.
RGB lighting can create coloured lighting effects. RGBW products add a separate white-light capability, while some systems offer additional white-light control options. The actual functions depend on the product specification.
These systems can create accent lighting around a tray ceiling, floating panel or entertainment area.
How to integrate the controls: Choose a controller designed for the selected LED type and verify compatibility with your chosen smart home ecosystem.
Design tip: Use colour-changing lighting as an accent rather than relying on it for every lighting need. A separate, suitable white-light source can provide comfortable everyday illumination.
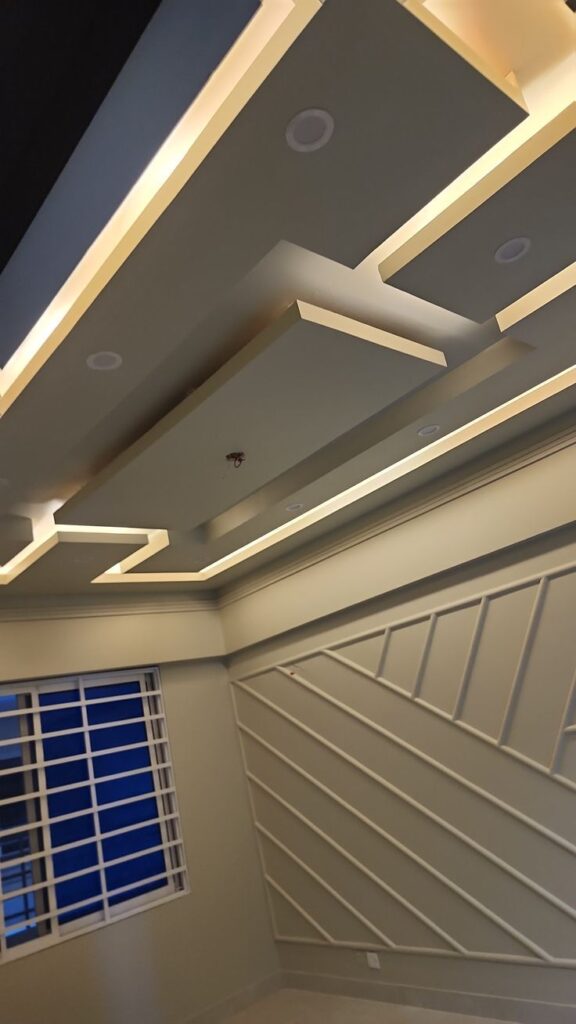
Understanding Smart Lighting Compatibility Before Installation
This is one of the most important parts of the project. Two products can both be described as smart lights but still use different protocols, controllers or dimming methods.
1. Choose your smart home platform
First, decide how you intend to control the lights. You may prefer a manufacturer’s app, a compatible voice assistant, a dedicated smart home hub or a platform that brings devices from different manufacturers together.
Check the features supported by the exact product model rather than assuming that every device works with every platform.
2. Understand Wi-Fi, Zigbee, Thread and Matter
Smart lighting products may use Wi-Fi, Zigbee, Thread or other communication technologies.
Matter is an interoperability standard intended to help compatible products work across supported smart home platforms. However, Matter does not mean that every lighting product automatically connects to every controller. Some products require a compatible hub or bridge, and the features available may vary.
Before purchase, check the product’s certification, supported platform, required hub and control functions. The Connectivity Standards Alliance’s Matter FAQ explains compatibility and bridging between technologies.
3. Decide between smart bulbs, smart switches and smart controllers
There are different ways to make ceiling lighting smart.
- Smart bulbs or smart fittings: The smart functions are built into the lighting product. The selected model may support remote switching, dimming or colour adjustment.
- Smart switches: These control compatible lighting circuits through a smart switch. The circuit, load and switching arrangement must suit the device.
- Smart LED controllers: These operate compatible LED strips or other supported lighting systems.
- Smart dimmers: These adjust brightness only when the dimmer and connected lights support the same dimming method.
Do not assume that smart bulbs work properly behind every smart dimmer. Some systems can flicker, buzz or behave incorrectly if the bulb and dimmer are incompatible. Follow the manufacturer’s instructions and have the electrical arrangement checked before installation.
4. Plan physical wall controls as well as app control
Smart lighting should remain practical for everyone using the room. Consider where wall switches or compatible scene controllers will be located.
Some smart bulbs need continuous power to remain available for app or voice control. If an ordinary switch cuts the power, those functions may stop until the power is restored.
Choose a control arrangement that works for your household rather than relying only on a mobile phone.
5. Confirm dimming and colour-temperature features
A fitting that supports smart switching may not support dimming or colour adjustment.
Check the exact specification. If you want separate brightness and colour-temperature control, the light, driver and controller must support those features.
6. Plan the electrical installation early
The electrician should know which smart switches, drivers and controllers have been selected before the wiring is finalised. Some products require particular wiring arrangements, and some smart switches have specific neutral-wire or load requirements.
Do not assume that the existing wiring will suit a new smart control system without inspection.
7. Leave access to hidden components
Gypsum ceilings can conceal drivers, controllers and connection points, but these components may need maintenance.
Plan access panels or other suitable access arrangements where required. Do not seal essential components in a way that prevents safe inspection or replacement.
Smart Lighting Features Worth Considering
Once the ceiling and lighting products are compatible, you can choose the smart functions that are useful for your home.
App control
Compatible lights can be operated through a supported mobile application. This is useful for adjusting lighting without walking to the wall switch.
Voice control
Some smart home systems allow supported lights to be controlled by voice through compatible assistants and devices. Verify compatibility before choosing the fittings.
Lighting scenes
Scenes combine preset settings across compatible lights. For example, a relaxation scene could reduce the brightness of the main lights and use softer accent lighting.
Scheduling
Scheduling can turn compatible lights on or off at set times. It can support routines such as switching selected lights off at bedtime.
Occupancy or motion-based control
Compatible sensors can trigger lighting automatically when movement is detected. This may be useful in corridors, stairways and selected utility spaces.
Remote control and notifications
Some systems allow remote operation when connected to the relevant network and service. Features differ by manufacturer, controller and home network setup.
Smart Gypsum Ceiling Designs for Different Rooms
The best design depends on the room’s dimensions and how you use the space.
Living rooms
A tray ceiling with concealed LED strips and separately controlled downlights can offer flexible lighting for everyday activities and entertainment.
Where the television sits on a feature wall, position the lights to minimise glare and distracting reflections.
Bedrooms
A flat or shallow tray ceiling with warm, dimmable lighting can support different bedroom routines. Keep the layout simple and consider separate bedside lighting for reading.
Kitchens
Kitchens need practical illumination over worktops and preparation areas. A smart gypsum ceiling can combine suitable general lighting with task lighting, but the final arrangement must also account for ventilation, heat, moisture and building services.
For commercial kitchen projects, explore CommercialKitchens.co.ke.
Home offices
A simple gypsum ceiling with suitable downlights or linear fittings can provide practical illumination. Consider screen glare, desk placement and the need for clear task lighting before choosing a lighting scene.
Hallways and stairways
Smart lighting with compatible occupancy sensors or scheduled control can be useful in circulation areas. Ensure that automatic controls provide adequate light when the space is in use.
Hotels and commercial interiors
Commercial settings may require more extensive coordination between ceiling lighting, controls, ventilation, fire detection, emergency lighting and maintenance access.
Discuss the technical requirements before approving a ceiling layout.
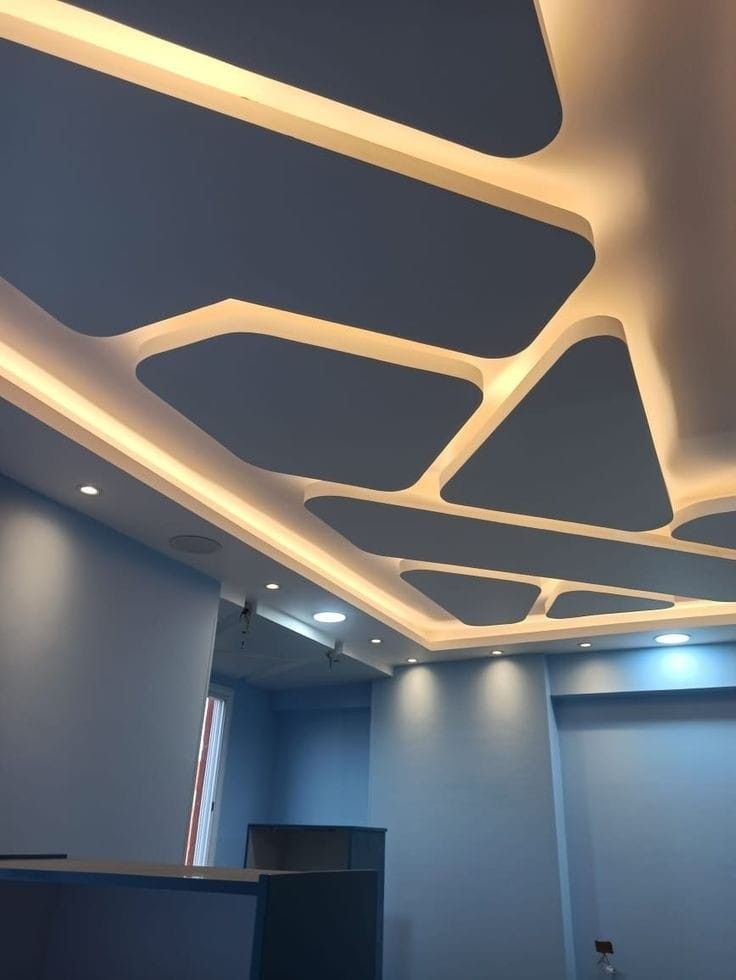
Cost of Smart-Ready Gypsum Ceiling Designs in Kenya
The cost of a smart-ready gypsum ceiling depends on the ceiling design, area, materials, lighting fittings, smart control equipment, wiring and finishing.
SUIMAS publishes the following indicative gypsum ceiling installation rates in its gypsum ceiling cost guide.
| Ceiling specification | Indicative planning rate |
|---|---|
| Plain gypsum ceiling | KES 1,000–1,500 per m² |
| Simple modern ceiling | KES 1,500–2,500 per m² |
| Bulkheads and stepped designs | KES 2,000–3,500+ per m² |
| Feature ceiling with cove lighting | KES 2,500–4,500+ per m² |
| Complex premium ceiling designs | KES 4,000–6,000+ per m² |
These figures are ceiling planning rates, not complete smart-home installation prices. Smart fittings, compatible drivers, controllers, switches, hubs, electrical work and configuration may add to the total. Ask for a project-specific quotation that lists these items separately.
What affects the smart lighting budget?
Ceiling area and design: Larger ceilings and complex multi-level designs need more materials and labour.
Lighting products: Standard downlights, tunable-white fittings, RGBW strips and decorative smart fixtures have different specifications and prices.
Control equipment: Smart switches, controllers, bridges or hubs may be required depending on the chosen system.
Electrical work: Existing wiring, switching arrangements and required circuits affect the installation.
Configuration and commissioning: Some projects require extra time to pair the devices, configure scenes and test the system.
Finishing and access: Recesses, access panels, painting and repairs influence the final cost.
Avoid budgeting for the gypsum ceiling alone if the purpose of the renovation is to achieve a fully functioning smart lighting system.
How to Plan a Smart-Ready Gypsum Ceiling Renovation
A clear process reduces the risk of incompatible products and expensive changes.
Step 1: Assess the room. Measure the ceiling, confirm the finished height and identify existing wiring and other services.
Step 2: Define the lighting requirements. Decide which areas need general, task or accent lighting, and which lights should operate together.
Step 3: Choose the smart home platform. Confirm the controller, required hub or bridge, supported app and compatible voice-assistant features if needed.
Step 4: Select the ceiling design. Choose a flat, tray, layered or other suitable design according to the room’s dimensions.
Step 5: Confirm the product specifications. Verify dimming, colour-temperature, controller and driver compatibility before buying equipment.
Step 6: Prepare the wiring plan. Have the electrician confirm switch positions, electrical requirements and maintenance access.
Step 7: Approve the quotation. Ensure the ceiling, lighting, controls, electrical work, finishing and configuration are clearly itemised.
Step 8: Install the framework and services. Coordinate the supporting system with the electrical installation before closing the ceiling.
Step 9: Fit and finish the gypsum boards. Complete the recesses, cut-outs, joints and painting as specified.
Step 10: Configure and test the smart lighting. Test wall controls, app functions, scenes, dimming and the features included in the agreed scope.
For wider renovation support, visit Renovation.co.ke.
Common Mistakes to Avoid
- Buying products before checking compatibility: Confirm the light, controller, dimmer and smart home platform work together.
- Assuming every LED light supports dimming: Verify the specification of the exact product.
- Using incompatible smart bulbs and dimmers: Follow the manufacturer’s requirements for the chosen lighting system.
- Forgetting physical switches: Plan practical wall controls alongside app or voice control.
- Closing the ceiling too early: Confirm all required wiring and components before the boards are installed.
- Sealing away drivers and controllers: Provide suitable access for maintenance.
- Adding too many ceiling levels: A complex design may raise costs without improving the room.
- Ignoring the existing electrical installation: Have the wiring and required switching arrangements assessed before the renovation.
- Skipping commissioning: Test the controls and scenes rather than assuming the system will work once the lights turn on.
Why Plan Your Smart Ceiling with Renovation by SUIMAS Interiors?
A smart-ready ceiling combines interior design with electrical planning. The best result comes from coordinating the gypsum shape, lighting layout, compatible products and installation sequence before the finished surface is closed.
Renovation by SUIMAS Interiors helps property owners plan ceiling and interior improvements as part of broader renovation projects.
Explore these related services:
- Renovation services
- Gypsum ceiling installation
- Gypsum ceiling designs
- Interior design services
- 3D design and layout planning
- Interior finishes
- Aluminium solutions
- Commercial kitchen solutions
These links can help readers plan the ceiling alongside wider interior design, renovation and fit-out requirements.
Areas We Serve
Renovation by SUIMAS Interiors welcomes enquiries across Kenya, subject to project scope, site assessment and availability. Our service coverage includes Nairobi, Kiambu, Nakuru, Mombasa, Kisumu, Uasin Gishu, Machakos, Kajiado, Kilifi, Nyeri, Meru, Kakamega, Bungoma, Kericho, Laikipia, Narok, Nandi, Baringo, Samburu, Turkana, West Pokot, Elgeyo-Marakwet, Trans Nzoia, Busia, Siaya, Homa Bay, Migori, Kisii, Nyamira, Vihiga, Kirinyaga, Murang’a, Nyandarua, Embu, Tharaka-Nithi, Kitui, Makueni, Taita-Taveta, Kwale, Tana River, Lamu, Garissa, Wajir, Mandera, Marsabit and Isiolo.
In Nairobi, enquiries may include Karen, Runda, Lavington, Kileleshwa, Kilimani, Westlands, Parklands, South B, South C, Lang’ata, Ruaka, Ruiru, Thika Road, Syokimau and Kitengela. In Mombasa and the Coast region, enquiries may include Nyali, Bamburi, Shanzu, Diani, Kilifi and Malindi.
Contact the team to confirm availability, site assessment arrangements and any transport requirements for your location.
Request a Smart-Ready Gypsum Ceiling Consultation
Planning to install a gypsum ceiling compatible with smart home lighting? Renovation by SUIMAS Interiors can help you plan the ceiling design, coordinate lighting requirements and identify the work needed for your renovation.
When making an enquiry, share your location, ceiling measurements, preferred design, smart home platform, lighting functions and whether the project includes electrical upgrades or other interior improvements.
Start your project enquiry:
- Renovation consultation: https://renovation.co.ke/contact/
- Main website: https://suimas.co.ke/
- Interior design: https://interiordesigners.co.ke/
- Email: info@suimas.co.ke / info@interiordesigners.co.ke
- Phone: 0717 044 443 / 0739 255 050
- Location: Nairobi CBD
Plan the smart lighting before the ceiling is closed, check the compatibility of every component and retain access to the equipment that may need maintenance. These steps help you avoid unnecessary rework and create a ceiling that looks good and works as intended.
Frequently Asked Questions
1. What is a smart-ready gypsum ceiling?
It is a gypsum ceiling designed to accommodate compatible smart lights, controllers, drivers, wiring and access requirements. The smart functions depend on the components and control platform selected.
2. Can I control gypsum ceiling lights using my phone?
Yes, provided the selected lights or controls support app operation and are configured with the appropriate system. Some products require a hub or bridge, while others connect directly using a supported network.
3. Do all smart ceiling lights work with Alexa, Google Home or Apple Home?
No. Compatibility depends on the exact product and supported platform. Check the manufacturer’s specification before purchasing. A Matter-certified product can improve interoperability, but you should still verify the functions and requirements of the specific device.
4. Can I add smart lighting to an existing gypsum ceiling?
Often it is possible, but a site assessment is necessary. The available ceiling space, wiring, condition of the boards and access to drivers or controllers determine what can be done without major alterations.
5. Can smart LED strips be dimmed?
Some can. The LED strip, driver and controller must all support the selected dimming method. Confirm compatibility before installation.
6. Should I choose smart bulbs or smart switches?
Either may be appropriate, depending on the project. Smart bulbs have their own control functions, while smart switches control compatible circuits. Avoid combining smart bulbs with incompatible dimmer switches.
7. What happens if the internet goes down?
The behaviour depends on the products and system architecture. Some controls may continue to work locally, while app access, voice control or remote functions may be limited. Ask the installer which functions remain available without an internet connection.
8. Does smart lighting make gypsum ceiling installation more expensive?
It can increase the total cost because compatible fittings, drivers, controllers, wiring, configuration and access provisions may be required. The exact amount depends on the selected system and ceiling design.
9. How should smart lighting be planned during a renovation?
Choose the lighting platform and fittings before the electrical work is finalised. Coordinate wiring, switches, controller locations, ceiling recesses and maintenance access before installing the gypsum boards.
10. How do I request a quote through Renovation.co.ke?
Visit the Renovation contact page and share your room dimensions, preferred ceiling design, smart home platform and desired lighting functions.